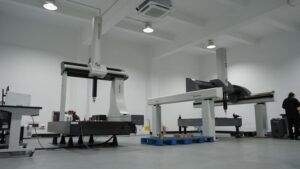
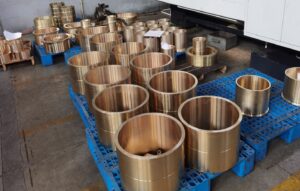
Coordinate = Coordinate Measuring Machine (CMM for short), is the point data obtained from the side head system of CMM in the measurable three-dimensional space orientation, and then calculate various geometric shapes and dimensions through its software system.
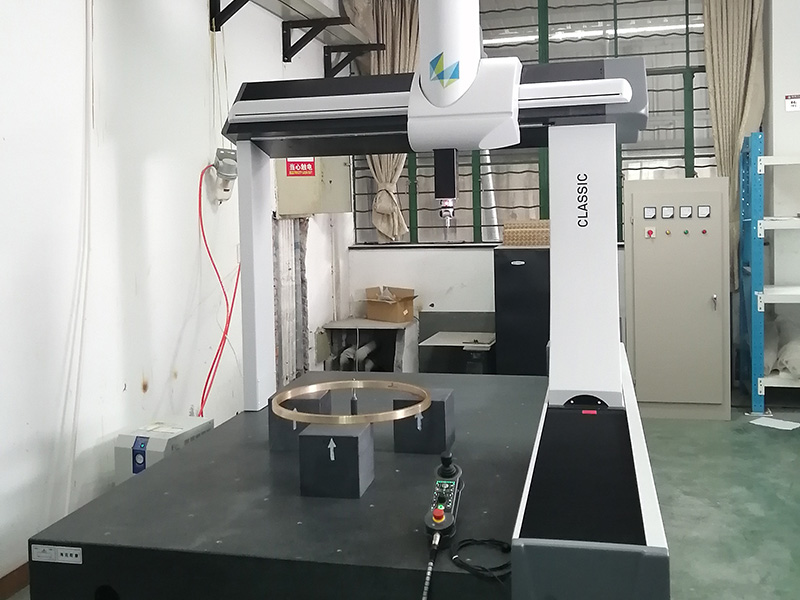
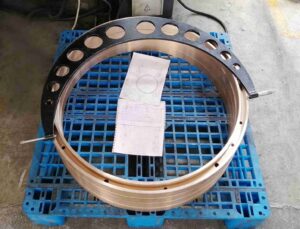
After the CMM inspection, we can get the shape tolerance data of copper bushing more accurately, whether it meets the requirements of the drawing.
What are the form tolerances for CMM inspection?
It is simple to understand the form tolerance as geometric tolerance. Because the point, line , and surface elements of the product after machining will have a slight error with the drawing requirements, this error includes both shape and position.
This error will affect the function of the product, and the general design of the drawing will be marked with the tolerance range.
Historical stages of the formation of the standard for dimensional tolerances
In 1969, the international ISO announced the standard of form tolerance, and in 1978, the principle and method of form tolerance inspection were recommended.
In 1980, China promulgated the standard of form tolerance, which includes the inspection provisions. Coordinates have been covering all the ways of such inspection.
Why do copper bushings need to be inspected by CMM?


Actually, not all factories in China are using Coordinate Measuring Machine (CMM), inspection. We have surveyed that 60% of our counterparts do not have CMM, and the remaining 30% buy very small CMM machines with low accuracy or even use them only occasionally.
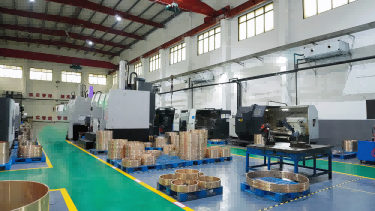
Only 10% of the companies like us use CMM as a routine inspection. We own a Hitescope that measures 1.2M in diameter and have ordered a Zeiss CMM. The increased precision required by our customers’ industry has also driven our industry to improve, equipment to improve, and products to improve, and the inspection of copper bushings requires higher precision requirements.
- Improve the accuracy of copper bushing measurement: Before the inspection of position tolerance by Coordinate Measuring Machine (CMM), the workshop personnel usually use an “outside diameter micrometer” and other tools to measure, this traditional measurement method is easy to lead to deviation of measurement results.
- Data traceability and total data analysis: With CMM inspection, electronic data records can be kept, and traceability and analysis can be done at the same time. Although the traditional inspection method can also be recorded, the archive is paper documents or scanned copies, more difficult to do analysis and comparison, as the project is very large.
- Compared to higher inspection efficiency and lower inspection cost: Coordinate equipment for form tolerance is very expensive, ranging from several hundred thousand to several million, depending on the size and accuracy of the inspection equipment.
Before purchasing the Coordinate Measuring Machine (CMM), we had two separate rooms dedicated to OD micrometers, with nearly 200 micrometers sorted by size.
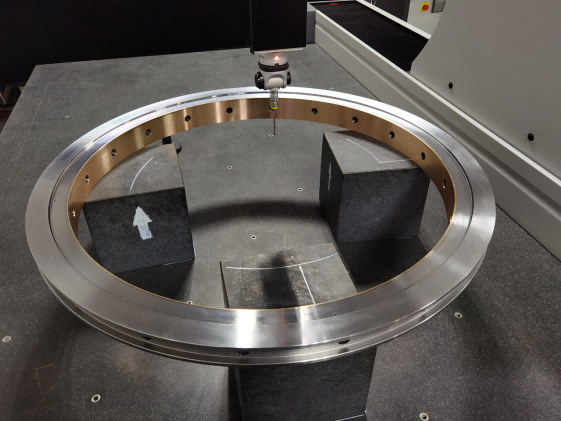


We have one Hexagon CMM at present, and with the increase in orders and the higher requirements of our customers, we have ordered a Zeiss CMM to cope with the huge amount of copper bushing inspection, which of course does not mean that we will abandon the conventional OD micrometers.
Of course, this does not mean that we will abandon the conventional OD micrometer measurement method, compared with the conventional inspection of peers, we have far surpassed them.
Which parts of copper bushings are measured by CMM?
The circle, deformation, hole, groove, surface, and other directions of the bronze bushing need to be measured accurately, which only the Coordinate Measuring Machines (CMM) can do. In the opposite direction, when a customer provides a very complex sample, we can provide the customer with an accurate drawing and product in combination with CMM.
Several types of CMM inspection.
By shape:
straightness, flatness, roundness, cylindricity, etc.
From the contour:
line contour degree and surface contour degree
From orientation:
parallelism, perpendicularity, tilt
From Positioning:
position, coaxial, symmetry, etc.
From runout:
circular runout and full runout.
What is the work of a coordinate measuring machine


- Use a coordinate measuring machine to measure the size of incoming parts and other parameters, and prepare coordinated inspection report.
- Summarize and archive the quality inspection records and related information.
- Maintain and optimize the measurement procedure of Coordinate Measuring Machines (CMM) to improve efficiency.
Coordinate inspector job duties.
- Responsible for the daily operation of the Coordinate Measuring Machines (CMM), regular calibration and measurement of products, and inspection tools.
- Will prepare the operation procedure of CMM.
- Carefully do the overhaul and maintenance of the three coordinates according to the equipment requirements.
- Manage various gauges.
- Cooperate with quality engineers to implement product audits.
What are the famous brands of CMM?


Hexagon, Zeiss, Eduard, Sirui, Layton, Japan Mitutoyo, Tokyo Precision, Korea Deren, Germany Wenzel, Italy cord3, One Xingbai, Verde, Zhitai, etc.
Choose the coordinate method need to pay attention to several points.
- Mainly look at the cost performance and after-sales service guarantee these two pieces.
- Take into account the brand awareness and retention, purchase budget, measurement function, measurement accuracy, etc.
- Coordinate cost performance can be compared from the equipment configuration performance and price.
- After-sales service: look at the response and arrival time of the service and service efficiency.
Coordinate measurement accuracy.
The price of Coordinate Measuring Machines (CMM) is determined by many aspects. Without considering service and other factors, generally speaking, the higher the accuracy, the more expensive the price, and the larger the range, the more expensive the price. This is because the lower the accuracy, the higher the cost to improve the accuracy.
- When the accuracy varies between 3um and 2um, the price does not change much;
- When the accuracy varies between 2um and 1 or 5um, the price changes a little more drastically;
- When the accuracy changes between 1,5um and 1, Oum, the price changes more rapidly.
- When the accuracy is less than 1um, the price change is already very fast.
At present, the accuracy of CMMs on the market is generally marked at 2um ~ 3um for equipment with a range of 1000mm or less, and the cost of the measuring machine will not change within this range. 0.002mm~0.005mm.

What are the advantages of Hexagon’s CMM and Zeiss’s CMM (price, use, accuracy, maintenance, after-sales service)?
You can’t compare them in such a general way, because each brand has different high and low configurations, just like a car. The price, accuracy, operability, maintenance, etc. are different for different configurations.
The top three CMM companies
Both Zeiss and Hexagon are two of the most influential brands in the Coordinate Measuring Machines (CMM) market today. If you have to compare them in detail as specified above, you have to specify the specific model of each brand, otherwise, they are not comparable. But even so, the two are each strong points. Who is more advantageous, depends on the specific needs of the user.
In addition, to add a point: from the overall point of view, Hexagon’s machine comprehensive cost performance is higher, and Zeiss’s machine is more accurate (this is not to say that Hexagon does not have a high-precision machine).
Therefore, in the mainstream market, Hexagon’s machines have the highest market share, while in the high-end market (mainly for ultra-high precision applications), Zeiss is more competitive.
There is also after-sales service, both are international brands, so you can rest assured in this regard. Both companies have professional after-sales service teams to provide comprehensive and fast technical support.
Briefly talk about the advantages and disadvantages of the two brands of three coordinates

Zeiss Coordinate Measuring Machines (CMM) is the world’s top coordinate brand, and also the top of other metrology fields.
- Advantages: high brand awareness, good product quality, high accuracy, and good stability.
- Disadvantages: expensive and slightly longer after-sales service response time.

Hexagon is currently the highest-selling Coordinate Measuring Machines (CMM) brand in the world, with many product models and accuracy from high to the ground.
- Advantages: high brand awareness, good product quality, high accuracy, good stability, local service advantage, and fast after-sales service.
- Disadvantages: In addition to the Leitz series, the rest of the products are slightly weaker in all aspects compared to Zeiss.
Coordinate measurement charges.
Some factories do not have Coordinate Measuring Machines (CMM), they just entrust other factories to do the inspection. This is also part of the three-coordinate inspection market, there are also people to leave a message, asking whether we can take such inspection business, although we can not provide such services, also to them have to understand this market
general three-coordinate service is not calculated thermostat time, only programming time and measurement time.
There are two types of charges.
1. By time, RMB 100-300 RMB/hour, mainly for single-piece multi-species measurement, because it takes a lot of programming preparation time, and the operator has to put in a lot of mental work, which is technical work, and the charge is relatively higher.
2. By pieces, RMB 20~200 RMB/piece, mainly used for single-variety batch testing, the specific unit price depends on the measurement time of each piece, this kind only needs to program a program to be used repeatedly, the operator’s mental labor is lighter, the labor of loading and unloading workpieces is more, this is physical work, the charge is relatively lower.

Off-topic(CMM solution)
The knowledge of measuring dimensions is deep, which includes accurate measurements, measurement errors, measure precision components, measuring equipment, etc. I think it is a measurement science, and with CMM equipment there is quality assurance. With this equipment, we can consider: the optimal performance of precision parts, objects.
Purchasing a new CMM equipment is expensive and requires attention to care and maintenance including: probe tip, laser scanning, probe contacts, touch probes, traditional CMMS, CMM probes, sheet metal, and other devices.
The CMM software probing system requires that the physical objects, object’s surface, the three axes, probe’s position, etc. be kept clean. the CMM equipment also requires a suitable environment for installation. We have a quality lab and metrology lab, both in a controlled environment with a constant temperature. We are well informed to exceed our peers in copper bushing quality.
